HOW TO MEASURE THE “Rolla-Ray” SEE-THROUGH SOLAR FILM ROLLER BLIND
a) The recess or reveal fit
- To measure the width; use the NARROWEST measurement between the top and bottom recess measurement in millimetres
- To measure the height; use the SHORTEST measurement between the left and right hand-side of the upright recess measurement in millimetres.
b) The face mount or wall fix mount
- Do as in (a) (1) above and add +30 millimetres to each side of the recess width
- Do as per (a) (2) above and add +30 millimetres to the recess height
For “finished or blind sizes or pin to- pin sizes”, take the wall to wall width dimension and deduct 7 millimetres (Applicable to trade clients)
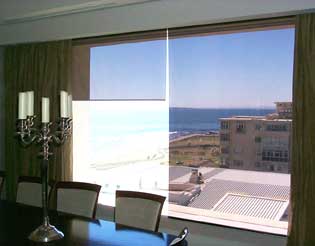
BLINDS MOUNTED IN THE RECESS SHOULD BE POSITIONED THAT THE FILM IS NO CLOSER THAN 20 MILLIMETRES FROM THE GLAZING FOR AN OPTIMUM EFFECT.
FITTING THE “ROLLA-RAY” SEE-THRU SOLAR FILM ROLLER BLIND
a) THE RECESS FIT
-
Establish whether an unobstructed 50 mm recess opening is available, free from any obstruction such as window, door handles, alarm magnets, other blinds or curtain tracks, burglar- proofing. If so;
-
Position the mounting thumb-release clips; 20mm from the window frame(inward) AND70 mm from the left hand as well as from the right hand- side, and MARK.
-
Now both mounting clips have been marked for mounting
- Drill into masonry using a 5,5 mm masonry drill bit, sufficient to allow for the wall plug shoulder to sit comfortably up against the wall recess.
- Using a countersunk (full thread for better grip) screw, mount the top clip securely with the thumb- release facing toward you. ensure that the mounting clip, in its secured position, lies exactly perpendicular to the window frame.
- Install blind (noting that the silver side is to face outward) by positioning the mounting clip metal hooks inside the blind head rail and with an equal and gentle upward motion, force the front thumb release clip to engage the same.
- Two mounting clips are required for blinds less than 2 metres long where 3 mounting clips are required for blinds in excess of 2 metres wide.
THE OPENED BLIND SHOULD REST 10 MM ABOVE THE WINDOW SILL (RECOMMENDED RESTING POSITION.)
- THE FACE MOUNT FIT
- MARK 20 MM ABOVE THE RECESS ON THE LEFT AND ON THE RIGHT HAND- SIDE AGAINST THE WALL FACE.
- MEASURE AGAINST THE WALL FACE, INWARD OF THE RECESS POSITION 20 MM ON THE LEFT AND RIGHT HAND- SIDE AND MARK.
THE BLIND, ONCE INSTALLED, OUGHT TO OVERLAP + 30 MM ON EACH SIDE OF THE MOUNTING CLIP.
- DRILL THE HOLES FOR THE LEFT AND RIGHT HAND SIDE AND INSTALL THE SAME WITH THE THUMB RELEASE FACING UPWARD. (AS PER (A) (4) – (6) ABOVE
AS AN ADDED CORRECTION PROCEDURE, PLACE A FLUID LEVEL ON TOP OF THE FITTED BLIND HEAD RAIL TO CONFIRM THE DESIRED HORIZONTAL ACCURACY OF THE FITTED BLIND.
THE OPENED BLIND SHOULD REST 10 MM ABOVE THE WINDOW SILL (RECOMMENDED RESTING POSITION.)
USING THE THUMB AND INDEX FINGERS, SLIDE THE BLIND LEFT OR RIGHT TO ACHIEVE THE OPTIMUM GLAZING COVERAGE |
 |
| Pictures to follow. |
|
Step 1. Inspect the frame for any obstruction; Handles, wall brackets etc. |
| Step 1- Measure +50mm from frame |
|
|
| |
|
Step 2. Measure and mark the mounting clip (MC) position 50mm from the
Window frame or nearest window obstruction attached thereto and 70mm inward from the left and right hand-side per blind. |
| Step 2 - inspect frame for any film obstruction |
|
|
| |
|
Step 3.
Mark and drill all the 5.50mm holes using a masonry drill bit. |
| Step 3 - mark and drill hole |
|
|
| |
|
Step 4. Insert wall plug and screw (MC) to the wall with the release clip facing away from you. |
| Step 4 - Insert wall plug and thumb-screw clip to wall |
|
|
| |
|
Step 5. Position the (MC) perpendicularly to the window frame. |
| Step 5 - Position clip Perp. to frame |
|
|
| |
|
Step 6. Secure all clips and ensure they are all fixed in series. |
| Step 6 - Secure all clips. Ensure all are neatly in series |
|
|
| |
|
Step 7. Clean your hands. Holding the blind gently at each end, position and engage the blind head rail with the protruding teethe of the (MC) |
| Step 7 - With clean hands, engage front of headrail with fro |
|
|
| |
|
Step 8. Apply a controlled and gentle force in an upward motion until your hear two “clicking” sounds as the release clip engages with the head rail. |
| Step 8 - Apply gentle force in upward motion until you hear |
|
|
| |
|
Step 9.
Untie the side control chains and lower the blind film to the desired height above the floor/ window sill. |
| Step 9 - Untie the op. cords and lower to desired height |
|
|
| |
|
Step 10
The film weight may never rest on the window sill. The recommended height is 10-15mm from the floor or window sill. |
| Step 10 - Minimum allowance above sill - +10mm |
|
|
| |
|
Step 11.
Now, raise the film to rest 10mm from the top of the blind, remove the chain connector and sever the difference to allow the connector, when re-connected to rest at the opening of the pulley. |
| Step 11 - Raise film to rest 10mm from the top, remove chain |
|
|
| |
|
Step 12. Lower the film as in step 11. and repeat Step 11. in the lowered position. |
| Step 12 - Lower the film as in step 10 and repeat step 11 in |
|
|
| |
|
Step 13.
The blind is now reverse locked |
| Step 13 - The blind is now REVERSE LOCKED |
|
|
| |
|
Step 14. Repeat the action for all blinds and check for uniformity. Hint; Always keep a few metres |
| Step 14. Repeat for all blinds and check for uniformity |
|
|
|